
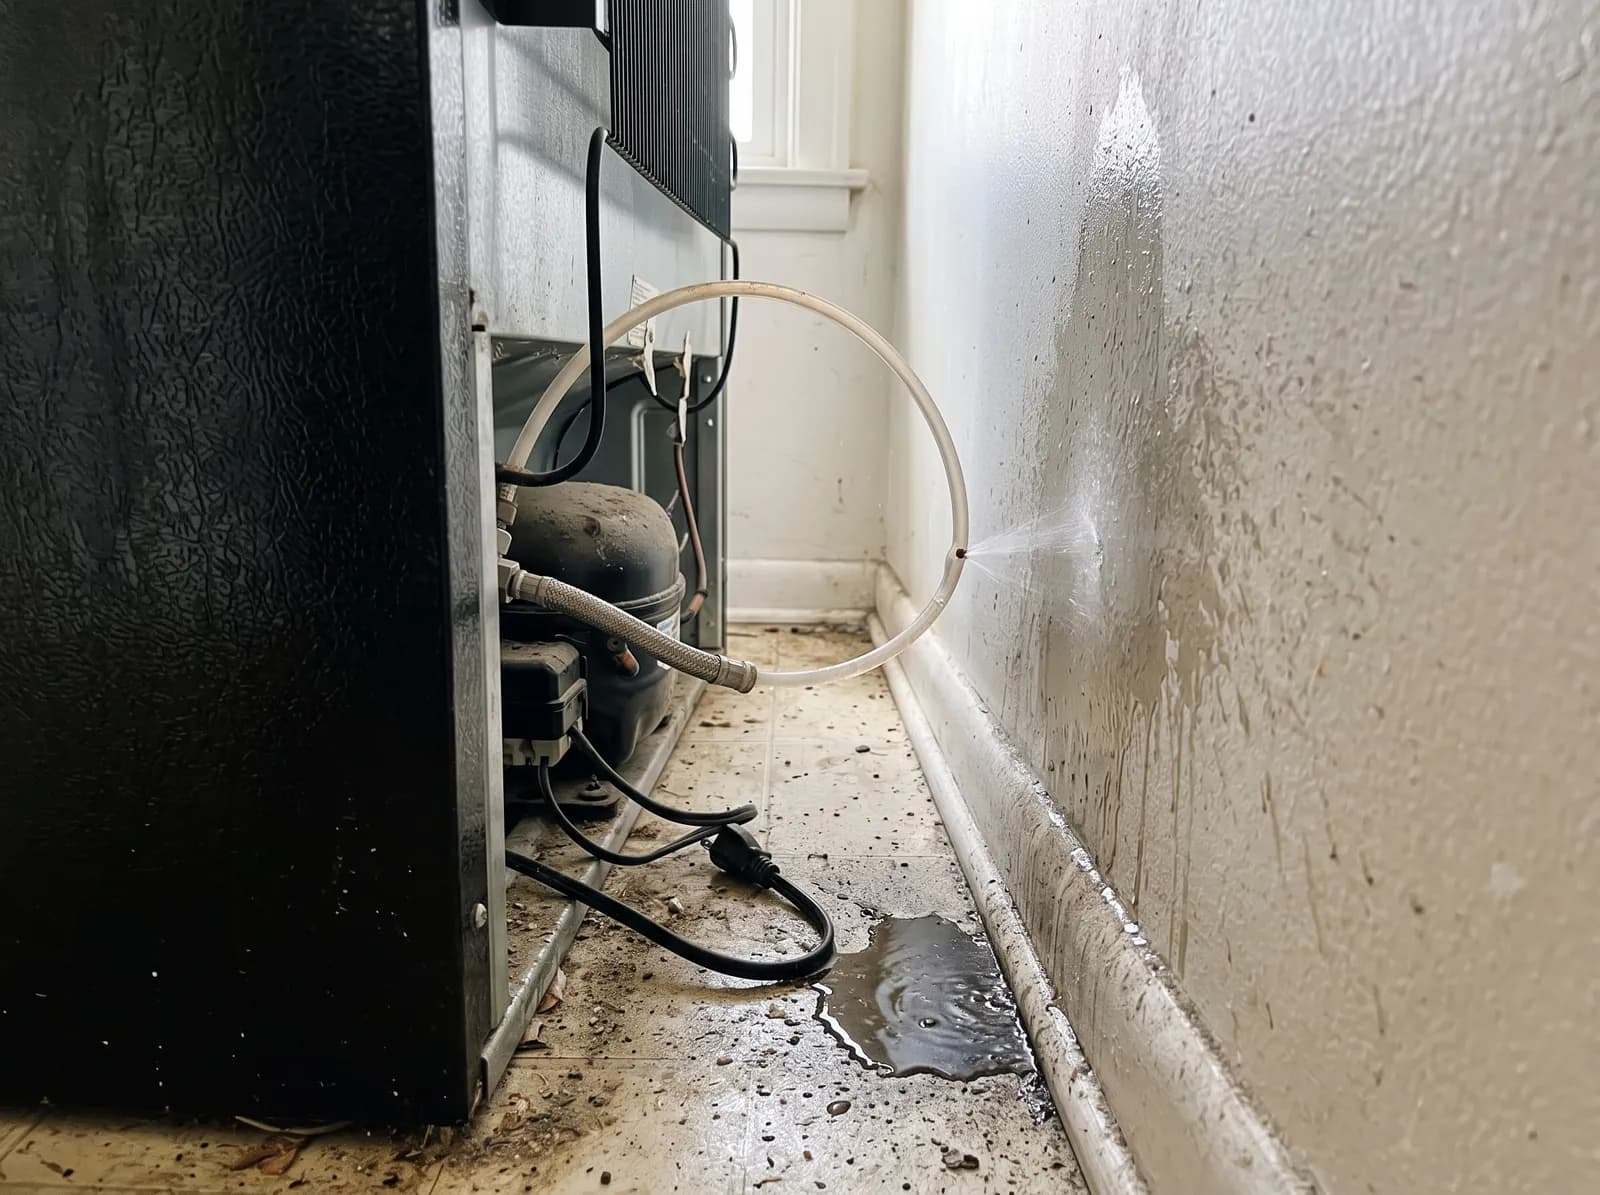
A leaking refrigerator can release standing water onto flooring, subflooring, and cabinetry within minutes, and untreated moisture creates conditions for mold growth within 24 to 48 hours. This guide covers the cleanup process in order, the point at which a professional restoration company becomes necessary, the common causes behind a refrigerator leak, and how homeowners insurance treats this type of claim.
How to Clean Up Refrigerator Leak Water Damage
Refrigerator leak water damage cleanup follows five sequential steps: stopping the water source, extracting standing water, drying the affected structure, checking for hidden moisture and mold, and repairing damaged materials. Each step depends on the one before it, and delaying any step increases the risk of structural damage or mold growth.
Step 1 — Stop the Leak and Cut Power to the Refrigerator
Stop a refrigerator leak by shutting off the water supply valve that feeds the appliance's water line and ice maker. The shutoff valve is typically located behind the refrigerator or under the nearest sink, and closing it prevents additional water from entering the leak point. Unplug the refrigerator from the electrical outlet before touching any pooled water, since combining electricity and standing water creates a shock hazard. Move the refrigerator away from the wall only after the water supply is off and the appliance is unplugged.
Step 2 — Remove Standing Water
Remove standing water with a wet vacuum, towels, or a mop, working from the outer edge of the spill toward the center to prevent the water from spreading further across the floor. A wet vacuum extracts water from hard flooring and low-pile carpet more thoroughly than towels alone. Standing water that reaches baseboards or cabinet toe kicks requires extraction from those areas as well, since trapped water behind baseboards continues to feed moisture into the wall cavity after the visible floor appears dry.
Step 3 — Dry the Floor, Subfloor, and Surrounding Areas
Dry the affected area with air movers, fans, and a dehumidifier running continuously until moisture readings return to a normal range. A moisture meter identifies whether water has penetrated the subfloor beneath vinyl, tile, or hardwood, since surface-level drying does not address moisture trapped underneath. Drying time varies by flooring type and water volume: a small spill on sealed tile may dry within 24 hours, while water that has penetrated a wood subfloor can require 3 to 5 days of continuous air movement. Open surrounding cabinet doors and remove any stored items from the base of cabinetry to allow airflow to reach wet interior surfaces.
Step 4 — Check for Mold and Hidden Moisture
Check for hidden moisture behind baseboards, under flooring, and inside cabinet bases using a moisture meter, since mold growth can begin within 24 to 48 hours on materials that remain wet. A moisture reading above the material's normal dry range indicates trapped water that requires additional drying time or removal of the affected material. Inspect for early mold signs, including a musty odor, discoloration on baseboards or drywall, and softened or warped material near the leak's origin point. Disinfect the affected area with an appropriate cleaning solution after drying is complete to reduce the risk of bacterial or mold growth on the cleaned surface.
Step 5 — Repair or Replace Damaged Materials
Repair or replace materials that show warping, staining, or structural softening after the drying process is complete. Warped flooring, delaminated laminate, and swollen particleboard cabinetry typically cannot be restored to their original condition and require replacement rather than repair. Baseboards that have absorbed water often need removal even when the visible finish appears intact, since the wood fibers can retain moisture that promotes mold growth behind a sealed painted surface. A contractor or restoration technician determines which materials are salvageable based on moisture readings taken after the drying phase, not on visual inspection alone.
DIY Cleanup vs. Calling a Professional Restoration Company
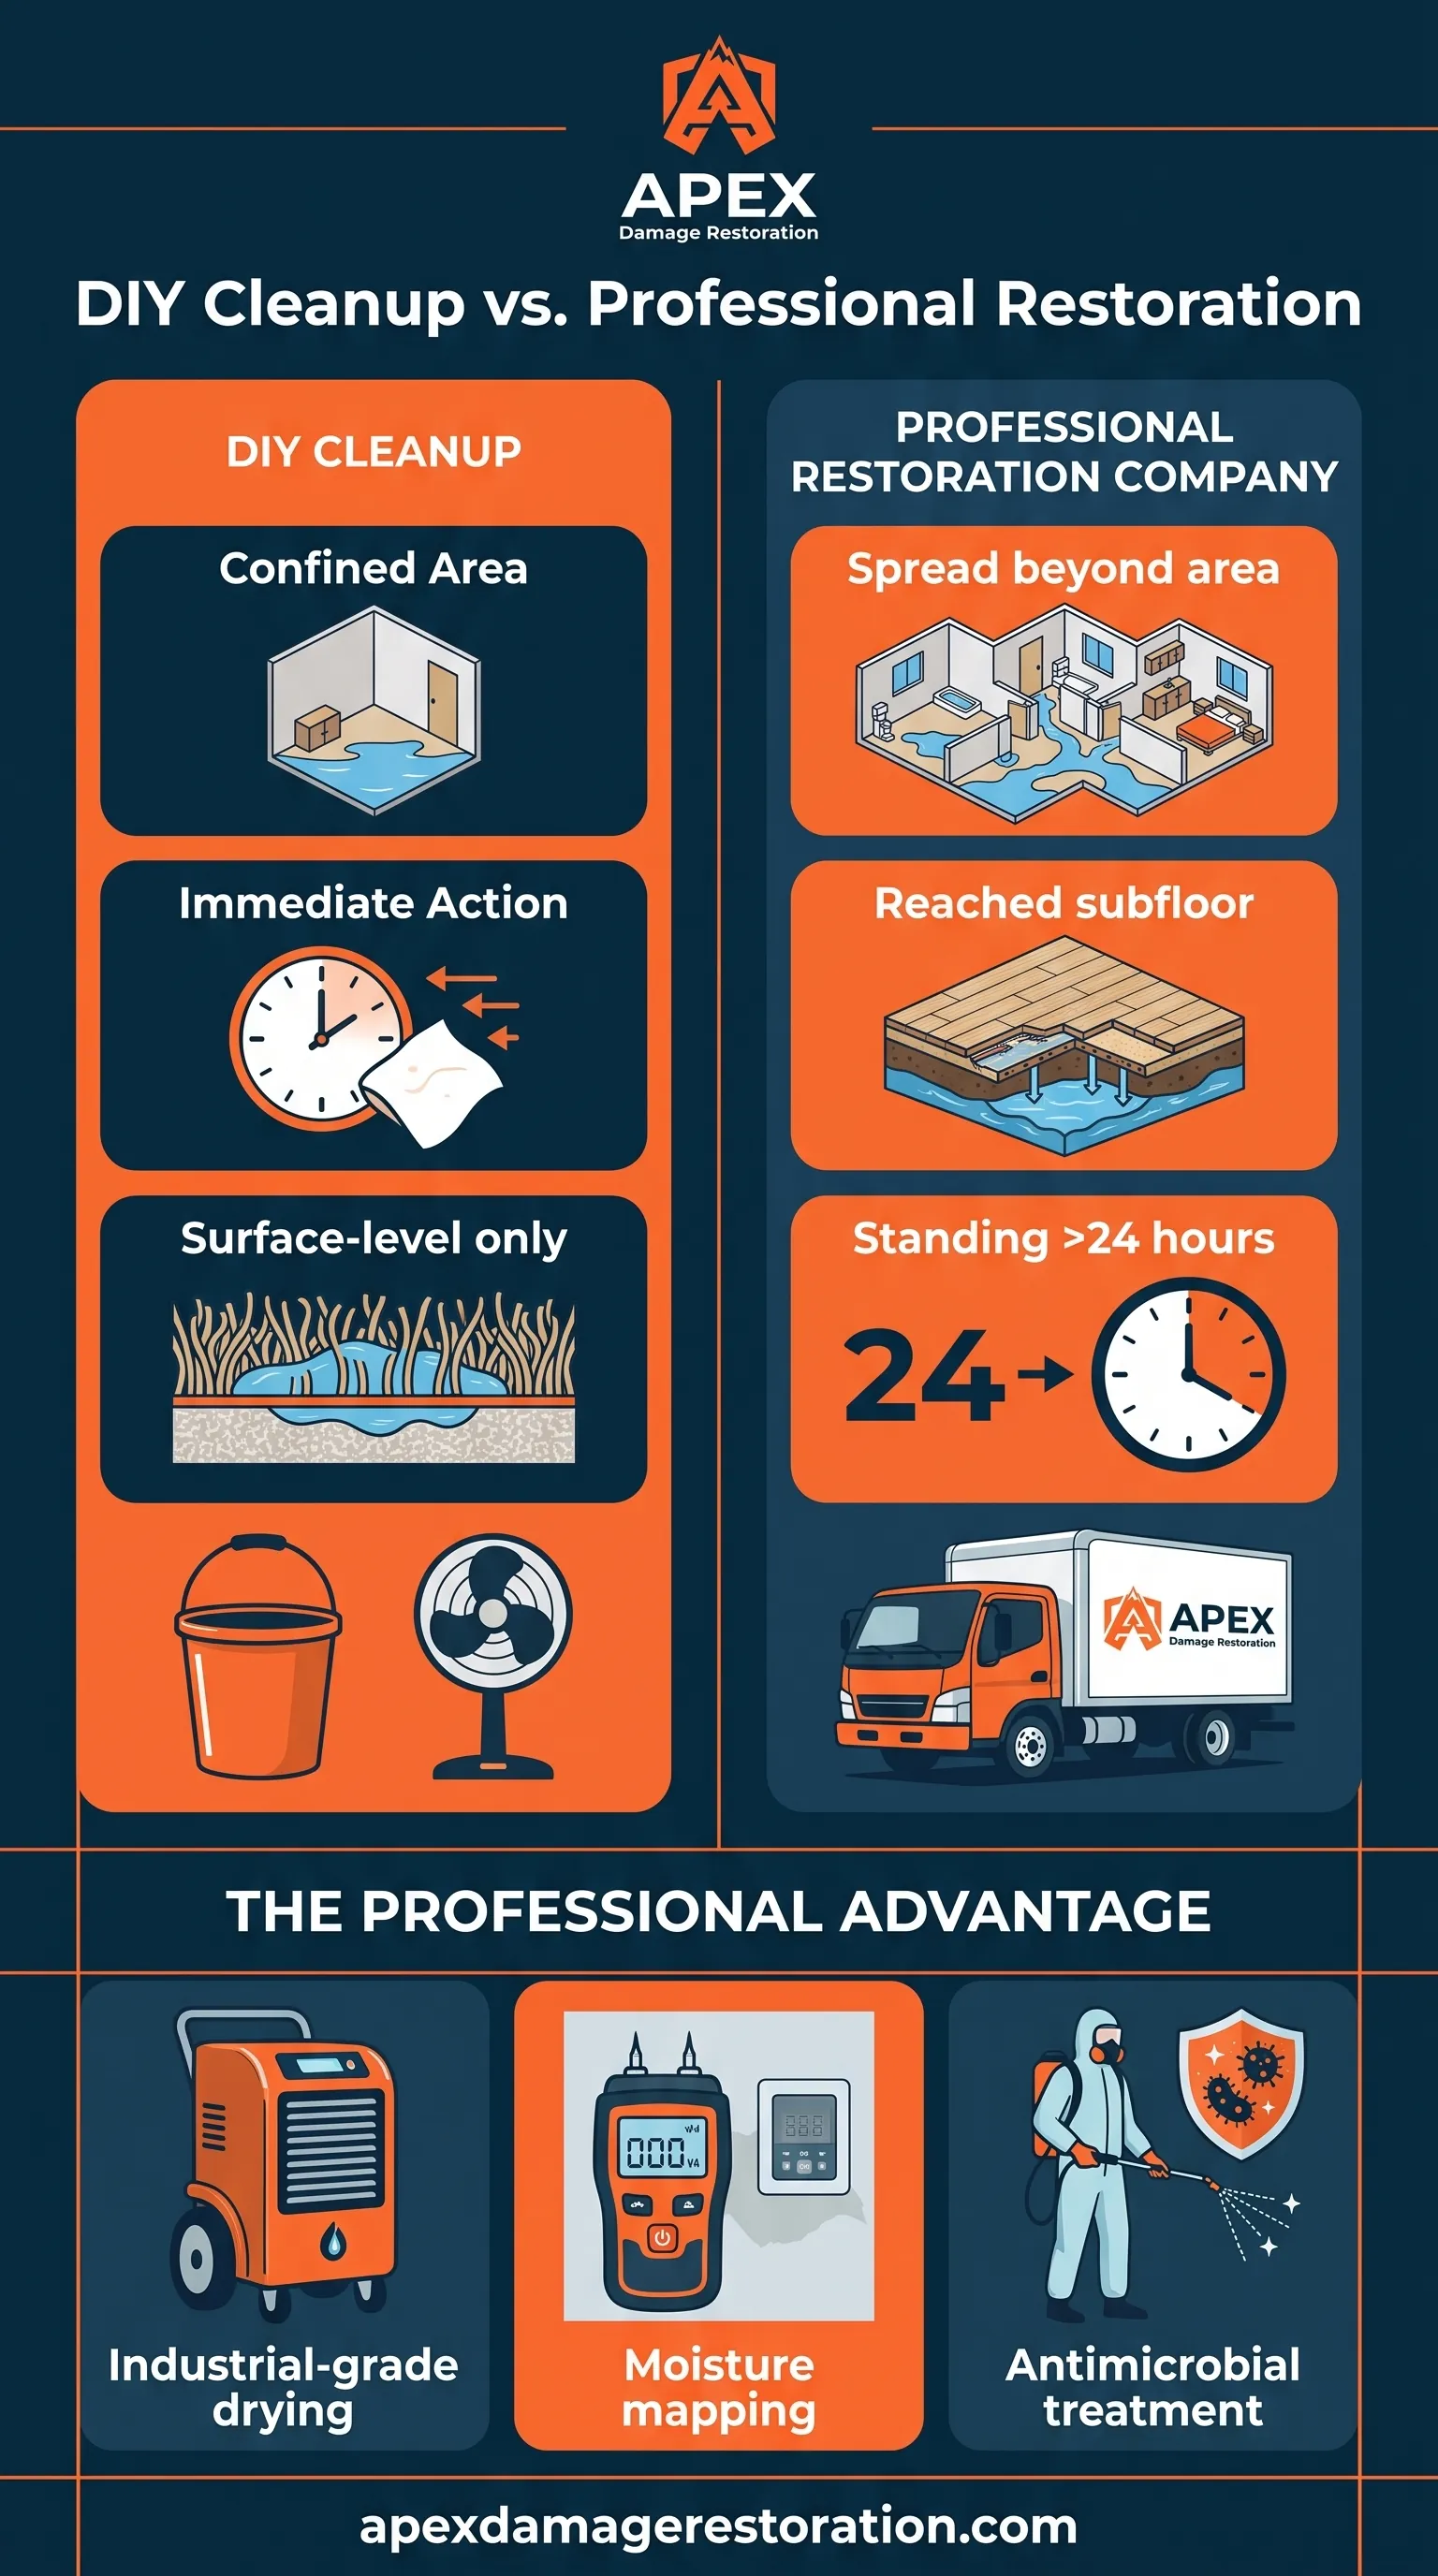
A homeowner can typically manage the cleanup independently when the water is confined to a small area, was addressed within a few hours, and has not penetrated subflooring or wall cavities. A professional restoration company becomes necessary when water has spread beyond the immediate area, reached a wood subfloor, or remained standing for more than 24 hours, since these conditions increase the likelihood of hidden moisture that a moisture meter and professional-grade drying equipment can detect and address more effectively than household fans.
Hidden moisture behind walls or under flooring is the primary reason DIY cleanup falls short: household dehumidifiers and fans dry exposed surfaces but do not reliably remove moisture trapped within a subfloor or wall cavity. A restoration company uses commercial air movers, industrial dehumidifiers, and moisture-mapping equipment to confirm that all affected materials have returned to a normal moisture range before closing the job. Mold risk also rises with the volume and duration of the leak; a restoration company can apply antimicrobial treatment to affected structural materials as part of the drying process, which reduces the chance of mold developing after the visible cleanup is finished.
Why Is My Refrigerator Leaking Water?
A refrigerator leaks water most often due to a cracked or disconnected water supply line, a clogged or frozen defrost drain, a worn door gasket, a cracked drip pan, or a damaged ice maker line. Identifying the specific source determines whether the leak requires a simple fix, such as clearing a drain, or a component replacement, such as a new water line or drip pan.
Refrigerator Water Line Leaks
A refrigerator water line leak occurs when the supply line that feeds the ice maker or water dispenser cracks, disconnects, or develops a faulty connection fitting. The water line typically runs from a shutoff valve near the refrigerator to a compression fitting on the back of the appliance, and a failure at either end produces a steady drip or a continuous leak depending on water pressure. A cracked line often results from the tubing being pinched when the refrigerator is pushed back against the wall, while a loose compression fitting develops after the tubing shifts or the fitting was not fully tightened during installation. Replacing the water line and securing the shutoff valve resolves most supply-line leaks.
Other Common Causes
Beyond the water supply line, several internal components can cause a refrigerator to leak. A clogged or frozen defrost drain prevents condensation from draining properly, causing water to back up and spill onto the floor beneath the unit. A worn or damaged door gasket allows warm, humid air to enter the refrigerator, increasing internal condensation that can overflow the drip pan. A cracked or misaligned drip pan, which normally collects and evaporates condensation, leaks directly onto the floor instead of containing the water. A refrigerator that is not level can also cause the drip pan to overflow on one side, since the pan requires a level surface to distribute condensation evenly.
Does Homeowners Insurance Cover Refrigerator Water Damage Cleanup?
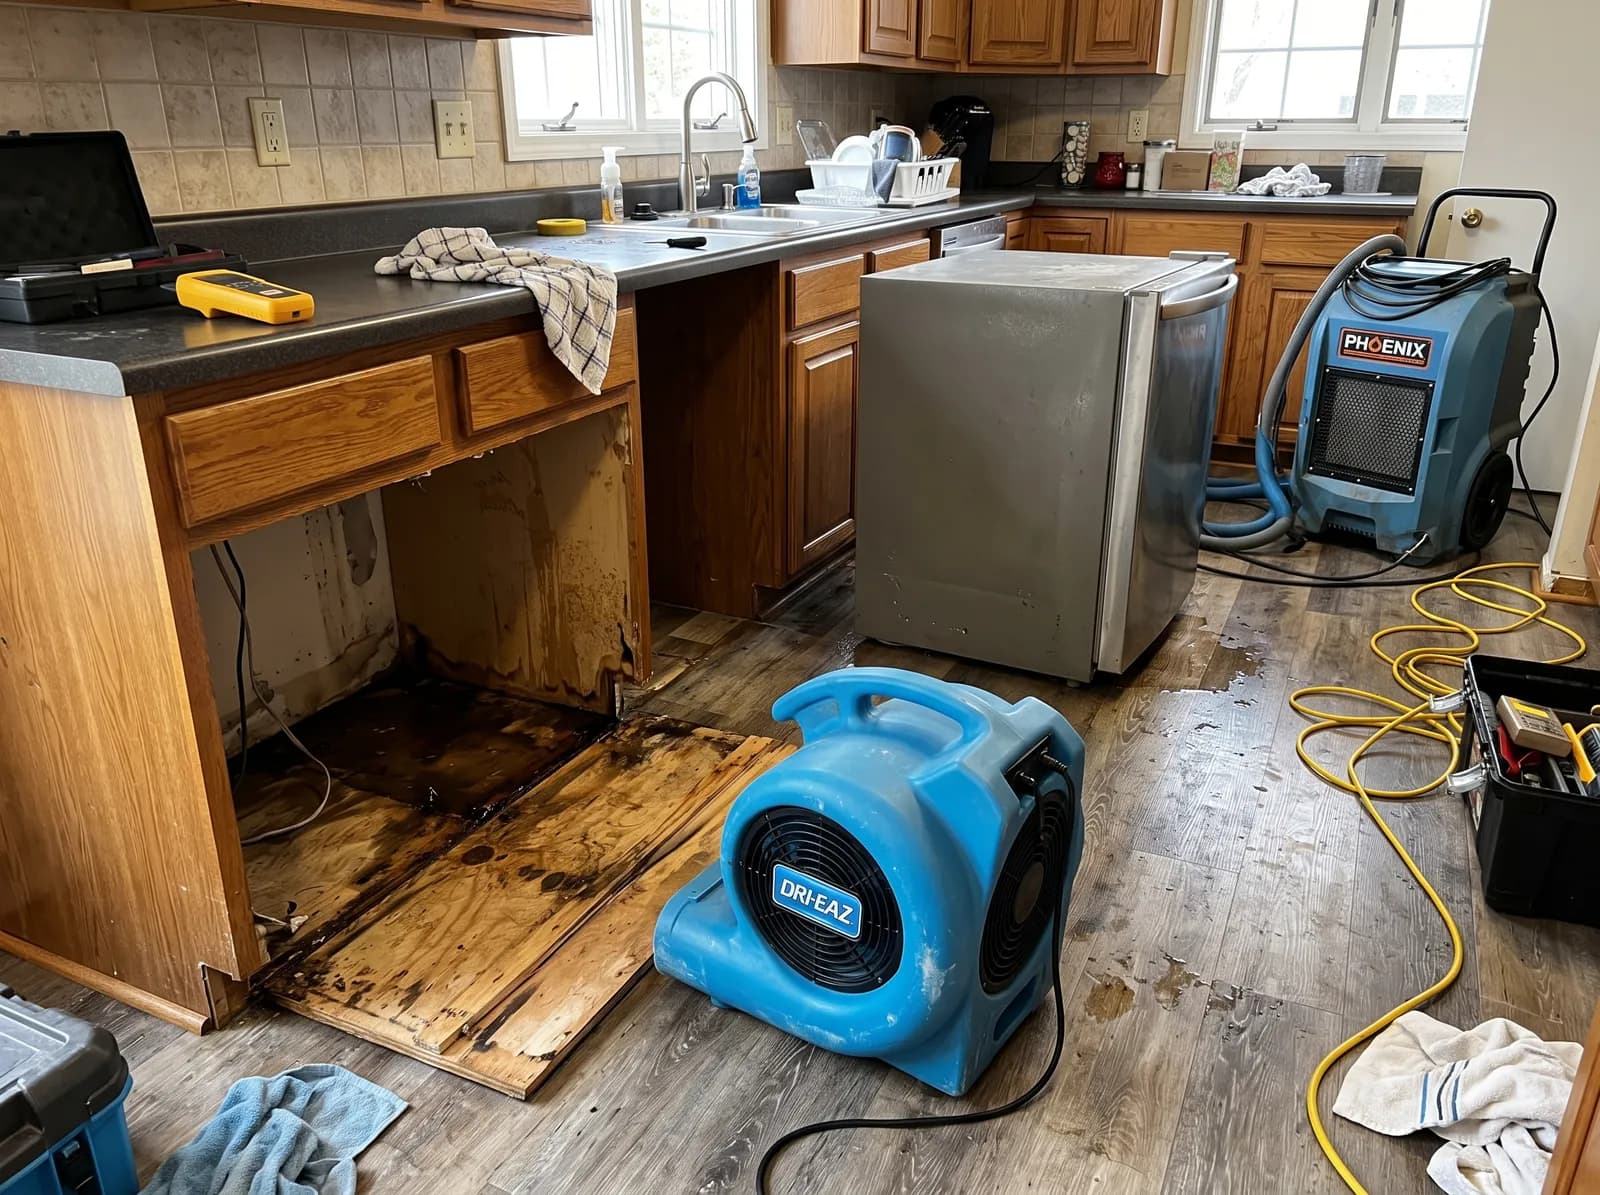
Homeowners insurance typically covers refrigerator water damage cleanup when the leak is classified as sudden and accidental, such as a water line that bursts without warning. Insurance generally excludes damage caused by a gradual leak, such as a slow drip from a worn gasket or a cracked drip pan that went unaddressed over weeks or months, since standard policies treat gradual leaks as a maintenance issue rather than a covered loss.
Sudden vs. Gradual Leaks: What Insurers Actually Look At
Insurers distinguish a covered claim from an excluded one by examining how long the leak was occurring and whether reasonable maintenance would have prevented it. A sudden and accidental discharge, such as a water supply line that cracks and releases water within minutes, meets the threshold for coverage under most homeowners policies. A gradual leak that produced visible staining, warping, or a musty odor over an extended period is more likely to be classified as a maintenance-related exclusion, since the adjuster's inspection looks for signs that the damage developed over time rather than in a single incident.
Filing a claim requires documentation that supports the sudden-discharge classification. Photograph the leak source, the affected area, and any visible damage before starting cleanup, and retain records of when the leak was discovered and when repairs began. An adjuster inspection typically evaluates the appliance's age and maintenance history alongside the physical evidence, since an older refrigerator or a previously known issue can support a gradual-leak determination even when the immediate spill appears sudden. A proof of loss document, submitted with photos, repair estimates, and a description of the incident, supports the claim during the adjuster's review.
Need Emergency Restoration Help Today?
Call Apex Damage Restoration now for fast priority dispatch across Aurora, CO, a written estimate before work begins, and direct insurance claims assistance.